To begin with, we needed to invite her friends to the party. We needed something special in order to set the pace for the rest of the event. It was going to be girly, full of fairies and a beautiful good time. We chose two different prints of 12x12 scrapbook paper, one a splotched design of darker pink and the other a white paper with light pink ribbons running through the paper. The wonderful thing about 12x12 sheets of scrapbook paper is that they come in an array of colors, textures and prints. You can fall in love with a piece of paper, and craft around it as the main eye catching work of art. This is what we chose to do, let the paper do most of the work for us!
We began by cutting the paper into 12"x6" pieces. This gave us 2 cards per piece of paper. A 6"x6" piece of white card-stock and a 24" piece of coordinating ribbon were also used to create the base card.

To create the opening doors of the front, fold the sides inward so they meet at the center. If your paper is cut properly, this should be 3 inches from both sides.

Most scrapbook paper is not thick enough to hold itself up as a card, and requires a bit of help to strengthen it. On the inside, I used a glue stick to affix a 6"x6" piece of white card-stock. No need to put card-stock on the front flaps, that could make it too heavy or bulky to work with. A simple square will do the trick. Choose a color that will enhance the scrapbook paper. I kept it white, because it looked best overall.

Mark a line centered along the entire length of the card, should be 3" from both top and bottom. Carefully erase the line roughly .5" from the center folds. You will run a very thin line of glue along this line, but in order for it to tie correctly it has to have a bit of room at the end or it will rip.


Because we decided to let the paper we chose be our overall focus, the ribbon color was chosen to enhance its design. This also meant that we were free to embellish our paper, but didn't need to go overboard. It was time to highlight the theme of our card, and create a sense of our 'fairy' themed tea party that was being announced.

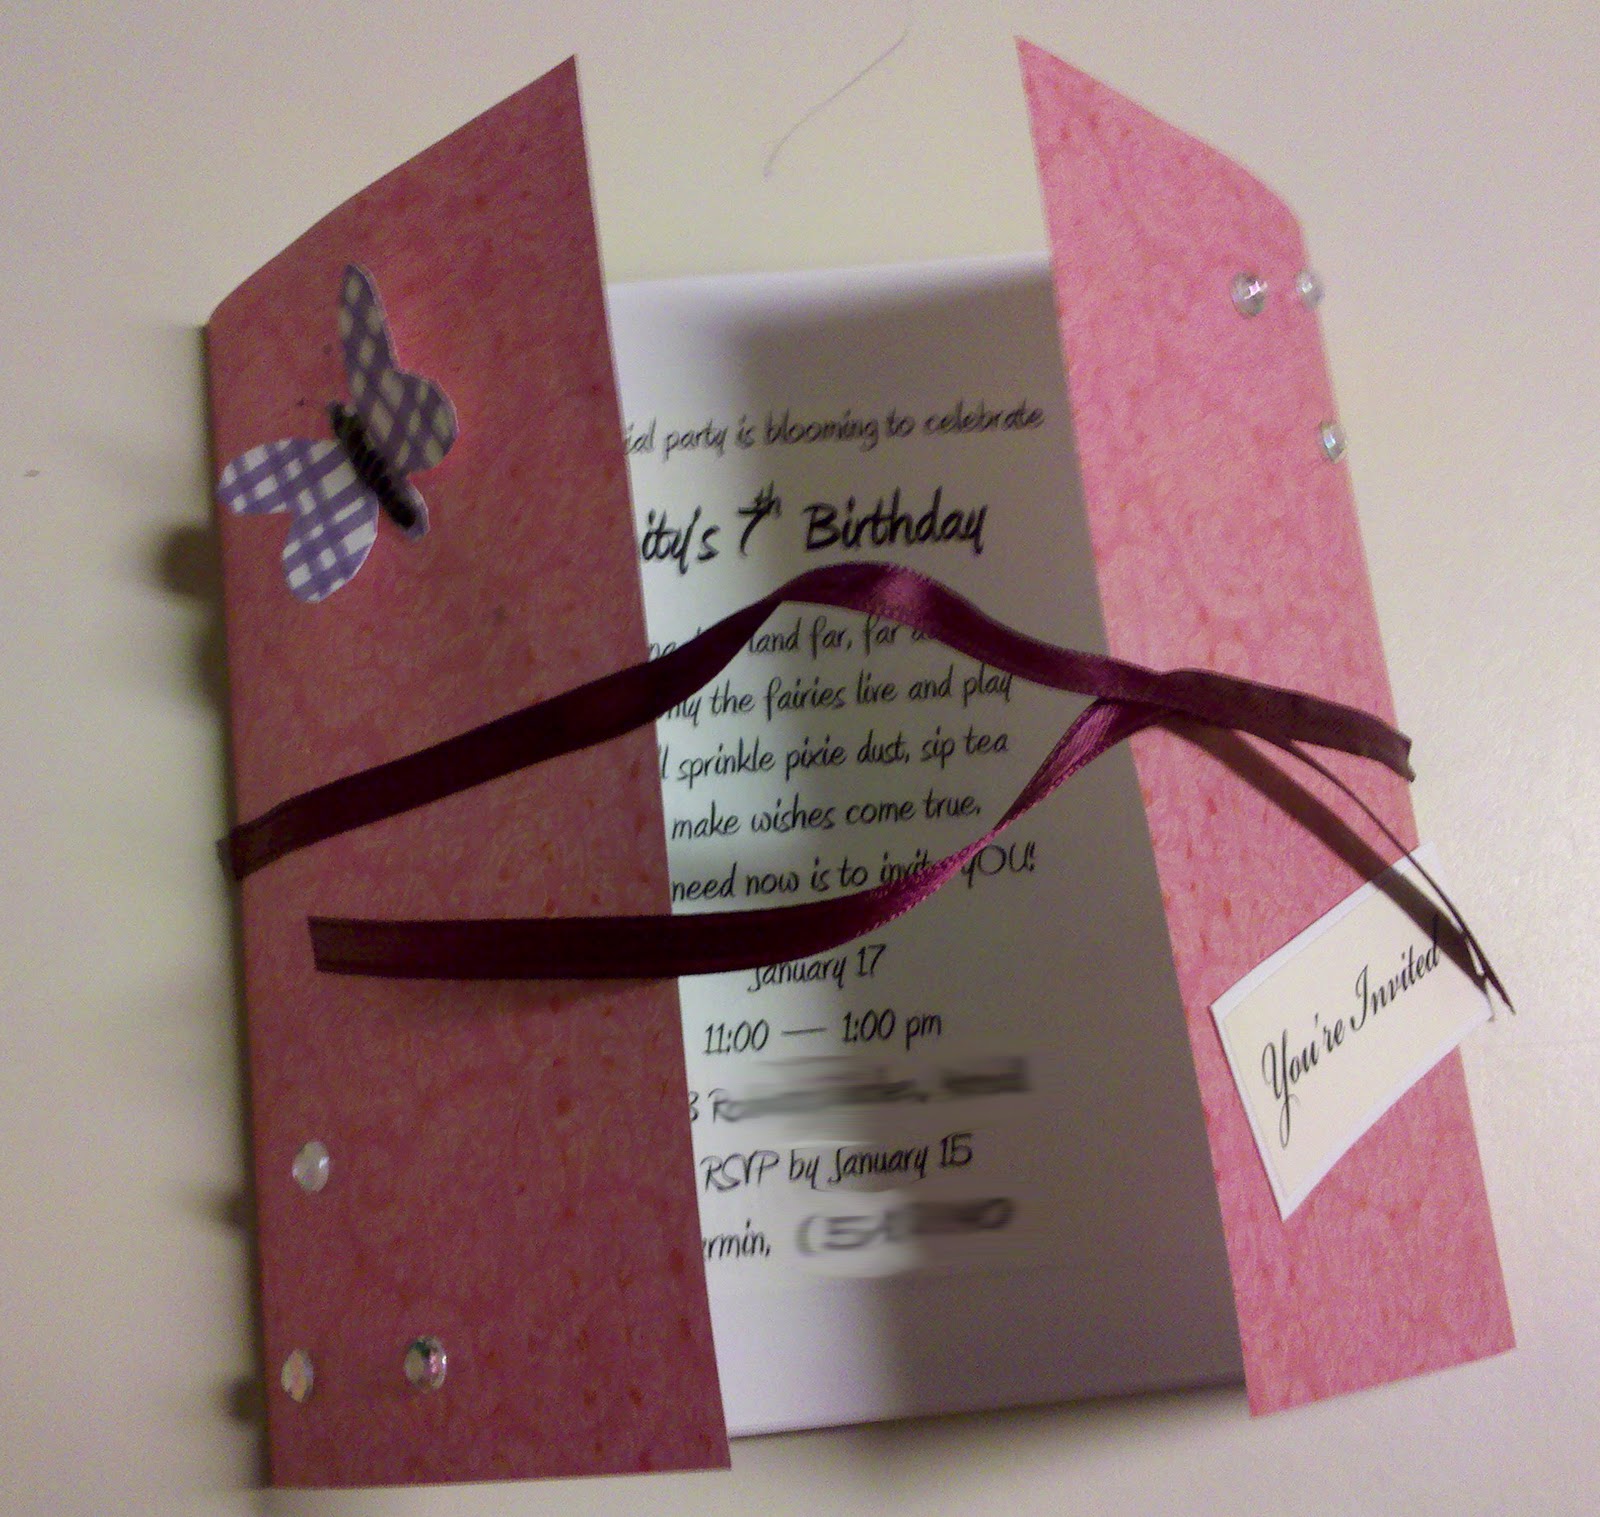
We began embellishing with simple sparkly rhinestones at opposing corners.

We added a butterfly, cut from a contrasting color and pattern. The body was embellished with black puff paint, to give it depth, and the antenna's were drawn onto the paper using a black fine-tip pen. Opposite the butterfly, we formally 'invited' the guests to the party. The words, You're Invited, were printed on a matching piece of card-stock and framed by a contrasting color. In this case, we chose a matching cream because it was similar to that of the faint design printed on the paper, and the contrasting white was also used inside the card. When the ribbon was tied closed, the card appeared as it would in its finished state.
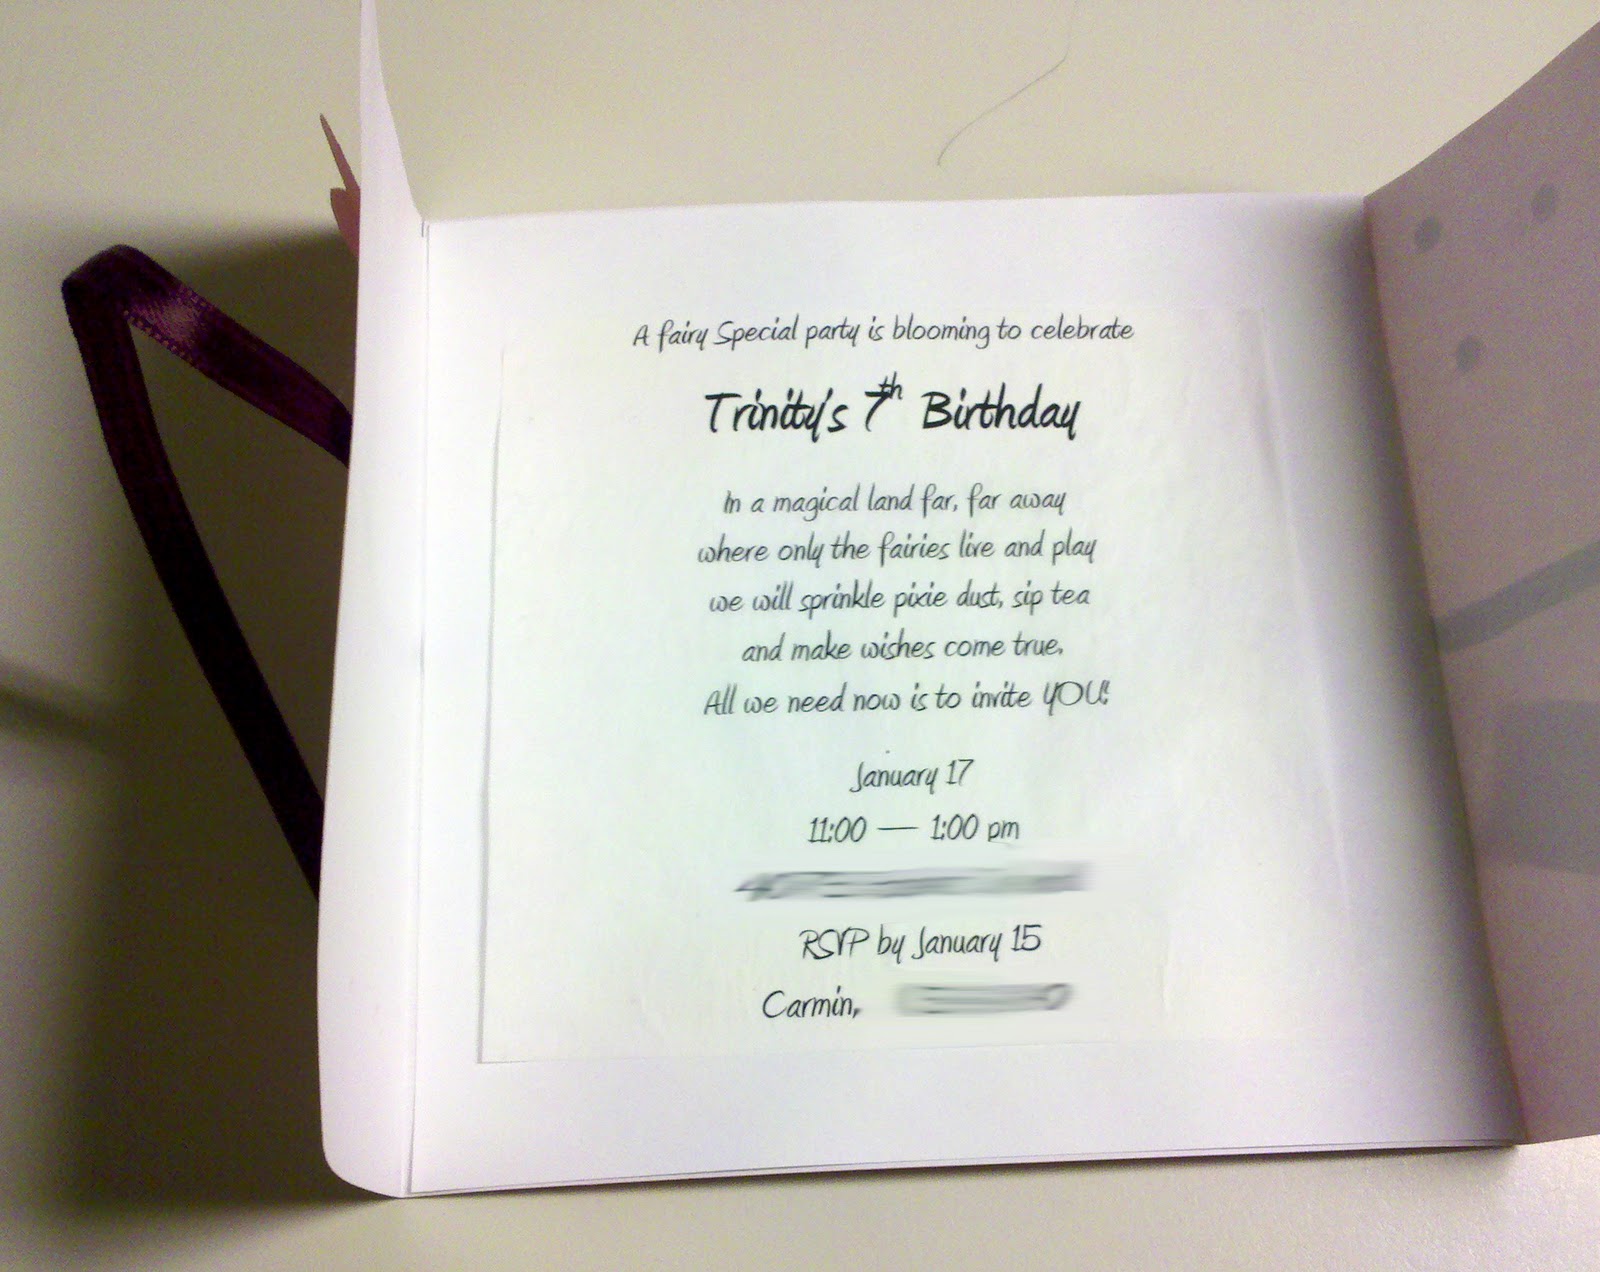
Opening the card would reveal the actual invitation inside,
The invitation inside used a fun poem found from the web which fit perfectly for our use. We gave the important details, as to the time and place. It was printed onto cream colored tracing paper, printed out and trimmed to fit.
Overall, the cards took only a few minutes each to assemble (minus glueing time for the ribbon, be certain to allow time for the ribbon to dry.) We first created each card to the point of allowing the ribbon to dry, then moved on to working on the printer. Once we assembled the outside invite and the internal invitation, all ribbons were ready to move onto the next step.
Thus, we had beautiful hand crafted party invitations... the first step in creating a wonderful fairy tea party.